Coach Steve Neal helps athletes develop their respiratory systems to improve performance. Find out how the testing works, the limiters it exposes, and what you can do to start training your own breathing.
Video Transcript
Ryan Kohler
Many of us are familiar with the typical physiological measurements:
- VO2 max
- Lactate threshold
- Fat oxidation.
But, there’s another limiter that is sometimes overlooked, and that’s respiration.
I did a test with Coach Steve Neal, who is an expert at understanding, and training respiration and athletes. Today, we’re going to look at my data, review it and look at how I can improve my respiration to improve performance.
Alright, Steve, thanks for joining us today, and let’s start off by giving us a quick background of what the protocol entailed that I actually went through.
Respiration testing protocol
Steve Neal 00:46
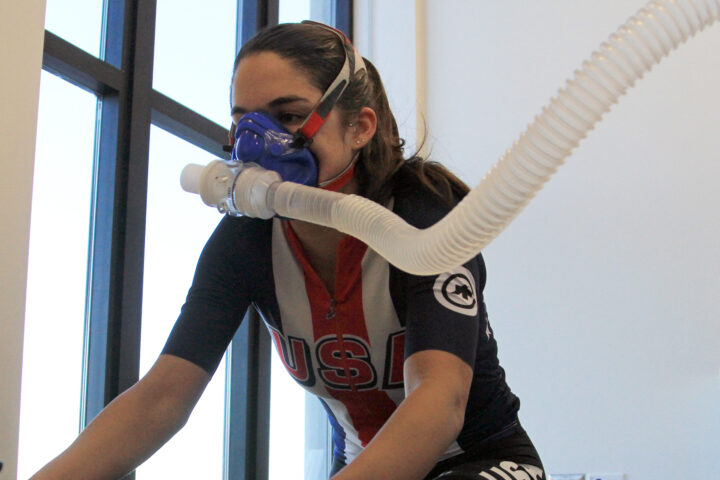
What we did was off the bike, we did a spirometry test, which is really looking at your forced expiratory volume in one second (FEV1), and the amount of air you can move in six seconds (FVC). After that, we jumped on the bike, and we basically followed up wearing a metabolic cart flow and a fairly traditional step test, we used four minutes. I like to use four minutes since it gives us a good amount of time for everything to stabilize heart rate, respiration, all the data we’re looking at. We didn’t go quite to failure, but it was close.
Ryan Kohler 01:14
So with those off-the-bike tests, you mentioned FVC and FEV1, those were completed off the bike, what did those tell you, as we get ready for this other the rest of the test?
Steve Neal 01:17
A few things really. The most important one that I’m really looking at is the FEV1, so how much air you can move in one second, that related to the FVC creates a ratio. Even medically, we’re kind of looking for something 78 to 82%. If your FEV1 is a little low, then it might already show a bit of a strength limiter, and how much air you can fortunately expire, that FEV1 number gets used later in the on the bike test to relate as a percentage of your tidal volume, which we’ll talk about a bit later to see how efficient you are with your breathing.
Ryan Kohler 02:04
We collected my FVC and my FEV1. How did those look to you?
Steve Neal 02:09
The FEV1 relative to the FVC as a percentage, we’re trying to get you in the 78-82% range, and you’re at right at 77%, so it’s like a minor strength limiter. So, that’s not a big deal. But it is already an indicator when you’re not working that your ability to blow off oxygen and CO2 is a problem.
How respiration relates to physiology
Ryan Kohler 02:33
So what’s the relationship like between FVC and FEV1 in terms of what it means for our physiology?
Steve Neal 02:39
One way I like to try to relate it is, FVC is kind of like our VO2 Max, and FEV1 is kind of like our threshold. If you have a low FEV1 relative to VO2 Max, you won’t be able to utilize all of that. Therefore, we always try to raise our threshold up to, you know, to a certain percentage that VO2 Max. I look at the FEV1 the same way, we want to try to raise that as high as we can, as opposed to the FVC.
Ryan Kohler 03:08
Amazing. Okay, so my 77% is like my threshold and through training, and we can work on bumping that up into the 80s, which would help improve.
Steve Neal 03:18
Absolutely, yeah. We’d want to strive for like 80. This is just resting though, so we want to try to get to 82 in resting. We want a little bit more on the bike. But we’ll talk about that in a second.
Ryan Kohler 03:27
Okay, so for off-the-bike results, I got a “D”, but they look okay, a little bit low, we can definitely improve there. How does that translate to on bike results?
Effect of respiration limiters
Steve Neal 03:37
What we want to do is look at the FEV1 as a percentage of the tidal volume that you move on the bike. This is kind of like looking at your respiration efficiency. If we look at the chart, you can see your range is kind of 36 to 57%, that’s absolutely normal. Like, if I test someone and they have never done any respiration training, I can almost guess it’s going to be 35 to 55. The goal there would be to have that range of 75 to 85. That’s really increasing the depth of breathing and slowing down the rates when we’re to the left of that peak (VT2).
You can see that red arrow on the chart is kind of where you’re closest to the goal percentage. To the left of that, the volume’s a little low, respiration rates a little bit high. That’s more of an endurance volume limiter. We want to work on lowering the breathing frequency, more expansion, moving more air for breath. To the right of that, you can see that when you respiration frequency kicks up; at VT2, you actually lose volume. It’s a bit of a coordination issue and a strength issue combined. So as you start to breathe faster, you can’t exhale forcefully enough to breathe back in. So if you can’t breathe out, you can’t breathe in. So to the right where you’re actually working really hard, you have less oxygen.
Ryan Kohler 05:03
That makes sense, and that’s pretty fascinating. That goes back to potentially that low FEV1, that 77%. Where as I go harder, I just don’t have the coordination and the strength to push that air out quickly enough.
Steve Neal 05:17
Exactly, 30, 34, 35, 40 breaths a minute, you only have a moment to breathe out. You have to be forceful to empty as much as you can to be able to get a nice deep breath back in.
Standard goal for breathing efficiency
Ryan Kohler 05:29
Then, how do these numbers compare to athletes that have trained the respiration, and what’s a good goal? What’s a high number to shoot for?
Steve Neal 05:42
If you compare, let’s say, you and I, which is maybe the only thing I can compare myself to you. The difference is up to 200 watts, if we compare ourselves, I’m sort of in the 88 to 102% range. At 200 watts, I can forcibly expire, and then I can take like four seconds, I can breathe out the second half, and breathe in really deep, because I have four seconds. But if your your respiration rate is higher, you don’t have as long to read back in. So you’re at around 47, 45, 48, 50, and I’m in that 96 to 102% range. So I’ve been doing this for like, 15 years, and I really, you know, you can get over 100%. But there’s been a big changes that happen if we can move that to 75%.
Ryan Kohler 06:30
I could imagine. Those are huge changes, and it sounds like this is a long term process to change that just like any training.
Steve Neal 06:38
Yeah, they’re their muscles, so they need endurance, strength, power, and coordination. The goal would be to try to get the respiration system into these goal ranges, so they’re out of the equation. Whatever your sport might be trying to analyze, like how you breathing on the bike, or running or whatever it is, you might do, and trying to make that respiration system be able to handle your hardest efforts on the bike without losing performance.
Then we just worry about your…
- Legs
- Heart
- Mind
- Nutrition
- All the other fun things we talked about all the time.
But, we want this one to be out of the way we don’t want it to be limited.
Training respiration at endurance and tempo
Ryan Kohler 07:14
Is there a way that I can start to train this when I’m on the bike?
Steve Neal 07:15
Yeah if you look to the left of the red arrow (endurance and tempo work), that’s where you can really try to just focus on breathing deeper, and the easiest way to do that is to do is at easier paces, breathe into your nose, and start to count and try to see if you can breathe in through your nose for three seconds. Then, you don’t have to blow off forcefully at low efforts. But it’s good practice to start to maybe breathe out and in for two seconds, and breathe in and breathe out in two seconds and breathe it in force. You’re not just working on this equal cycle, because when you get going harder, that’s not how it works. Really counting your breath, when you’re doing endurance in tempo, don’t let it be stressful.
Just go for a ride and breathe into your nose and out through your mouth. It might be two seconds in and two seconds out. Try to challenge yourself and maybe do three seconds in, and two seconds out, let that become comfortable. Four and two, four and three. So you’re trying to stretch the breathing time, lower the rate, increase the depth.
Ryan Kohler 08:25
That’s easy to basically have free respiration training on the bike at those low intensities.
Steve Neal 08:30
Certainly. Sadly, you can’t talk. It does require a lot of concentration. Sometimes when people start, they’re like, “I can’t really do this for more than five or six minutes, it gets hard.” That’s just the muscles in the coordination, that you’re challenging them a bit, which is what we want in any real form of training. I just really liked the respiration piece not to be that stressful. If you find five or six minutes where you’re like, “Wow, this is hard to think about.” Just stop for a bit, go back to breathing however you want, maybe just do respiration intervals, five minutes on five minutes off of your ride.
Ryan Kohler 09:07
So that was to the left of that arrow, what changes when you go to the right of that arrow to the high intensity exercise?
Training respiration at higher intensities
Steve Neal 09:14
Probably the biggest limiter over there is, as those breathing rates rise, you don’t have enough time to breathe deep, so you lose that volume. One thing you could try to do is expire a little bit more forcefully, so you’re breathing out harder and as deep as you can quickly and then once again, that’s going to give you a little bit more time to breathe in. That should help the volume go up. This is a tricky one. I kind of relate this to strength training a bit where if you start someone with strength training and they’re squatting, you would never work straight to maximal effort training because their technique is going to fall apart really quickly. That’s what happens and you can see that in the test as soon as you get up into that intensity, it just it just starts to drop off quick. I always get a bit nervous of like really discussing training, the highest part of breathing, because we might just be making it worse.
Ryan Kohler 10:10
We saw the comparison between your respiration and my respiration, and obviously, I want to close down that gap and get as close to you as possible because it’ll improve my performance. But what are what are the downfalls of not closing that gap down? If we’re out riding together, what are the disadvantages that I have, then as an athlete?
How anatomical dead space limits oxygen
Steve Neal 10:28
Yeah, I think the main disadvantage there with the low volume and the high rate is really this movement of “anatomical dead space” gas. From your nose and your mouth down into the bottom of those lungs, where we extract oxygen, we can extract oxygen in that space. Someone your size, you’re probably 170 milliliters of anatomical dead space at 18 breaths a minute, you’ll be 3100 milliliters of, of gas, not extracting oxygen from. If you lower the frequency, it’s just math. The lower that breathing frequency, the more gas you’re moving, that you can at least extract oxygen from.
Ryan Kohler 11:19
So this inefficiency, if we’re both riding together at 180 Watts, then I’m just moving more air that’s not being delivered to the muscles.
Steve Neal 11:28
Exactly. It just can’t be utilized.
Takeaways for respiration training
Ryan Kohler 11:32
All right, how would you tie this up as far as the take home points, after looking at all this data?
Steve Neal 11:38
I think the main takeaway really for you, Ryan, is that if you look to the there’s a lot of space to the left of that red arrow. We do a lot of endurance training, a lot of tempo at many events that many people do, and you’re going to do as well. If you do something that’s a long gravel race or some stage race, maybe at altitude, then respiration is going to be extremely important. To the left of that red arrow, lowering the breathing frequency without stress, trying to slowly increase your depth of breathing. Wherever you want to do that by maybe breathing out a little quicker and more forcefully to give yourself more time to breathe in. Don’t let it be stressful. Don’t forget, you might just have to start a little bits and pieces.
Ryan Kohler 12:21
Alright, well, thanks for all the information, Steve. I’m looking forward to getting my respiration training plan.
Steve Neal 12:26
Yeah, I’ll get that out really soon. I’m excited for you to start, I think you’re going to find this interesting and really advantageous.
Ryan Kohler 12:31
Great looking forward to it, and thanks again and see you next time!
Join us for upcoming workshops to learn more about this respiration training process. Be sure to take advantage of your membership by booking your health session with me or coach Steve Neal himself to continue to learn about your individual respiration and physiology.