Strength and conditioning coach Jess Elliott of TAG Performance has worked with many cyclists. She often sees similar issues when it comes to their core strength. These exercises will address those specific weaknesses that she so often sees.
In this series of core workouts, Jess walks through a multi-planar approach to core integrity. The goals are to build stability, efficiency, and resilience.
As she likes to say, these are the core movements that all cyclists should master. Remember to keep it simple and master the essentials. Every cyclist she’s worked with has needed help to learn how to execute these movements properly. Most people perform them incorrectly. So take your time understanding the mechanics of each movement; don’t try to progress too quickly.
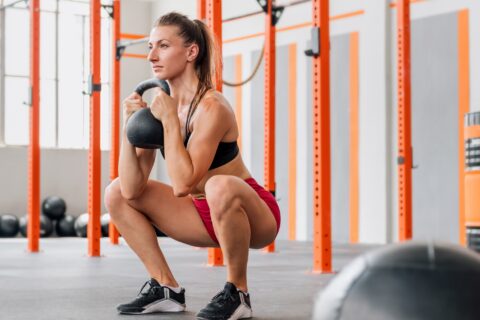
Of note, there’s no sophisticated equipment necessary to perform these exercises. For those athletes who want to try the advanced progressions, have a small stool and kettle bell handy.
For more on preventing injuries through strength and conditioning, check out Fast Talk, episode 87: Preventing Injuries Through Strength and Conditioning, with Jess Elliott.
For a better understanding of why it is so important to make time for off-the-bike strength and conditioning work, check out Cycling in Alignment, episode 16: Strength and Conditioning, with Jess Elliott of TAG Performance.
Coach Kohler’s take
Head Coach Ryan Kohler summarizes why these particular exercises are so critical for cyclists:
These are great exercises that will assist with your cycling. Coming from a mountain biking background, I particularly like movements that help with your stability and resilience as your banging down a rocky trail.
One of the key components is making sure that your center of mass (around the hips) is stable, while the arms and legs move appropriately to deal with the terrain.
One visual I like to think of is if you allowed the hips to draw a line in the air as they traveled downhill, you would see this nice small sine wave—there would be relatively little amplitude, but a nice consistency of movement.
The exercises
We recommend completing the exercises demonstrated in the video as a complete routine. Here are our suggestions as to the number of sets and repetitions/holds for each exercise:
Hollow Body Hold
Perform 2-3 sets starting at 15-second holds and progressing to 30-45 seconds.
Bear Hold and Progressions
Perform 2-3 sets starting at 15-second holds and progressing to 30-45 seconds.
Progress from a static hold to walking forward/backward in that position while maintaining a stable pelvis.
Lateral Plank with Adductor Activation
Perform 2-3 sets at 15-second holds and progressing to 30-45 seconds.
You can also add hip flexion/extension to the movement to increase difficulty.
Plank with Shoulder Taps
Perform 2-3 sets starting at five shoulder taps per side, working up to 10-15 taps per side.
Reverse Tabletop
Perform 2-3 sets starting with 10-15-second holds, working up to 30-45 second holds.
Progress by incorporating leg extension, holding one leg out for 5 seconds at a time before switching to the other leg. Do 2-3 repetitions per side of 5-second leg holds within your sets.
Video Transcript
Chris Case 00:01
Hey everyone, welcome to Fast Talk Laboratories, your source for the science of cycling performance.
Ryan Kohler 00:10
Hi, I’m coach Ryan Kohler here, and I’m with strength and conditioning coach Jess Elliot of TAG performance. She’s here to talk to you today about some essential core exercises for the offseason, and one of the things that I thought are really helpful with these exercises are the focuses on like you said, unilateral stability, I think is one point that comes up. And you know, we think about cycling, that’s oftentimes a pretty key component where we have to balance on one side or the other. And, you know, I think about it as like jamming down a rock garden and getting thrown around on the mountain bike a little bit. So being able to balance on different portions of the body seems like a really key component, and the other point, that’s a really good one you bring up today is the focus on not advancing those movements too soon. And I think that also carries over to cycling, where we want to focus on those fundamentals, focus on good movements first, and then gradually progress as we as we get become more advanced.
Hollow Body Hold Exercise
Jess Elliot 01:11
Alright, so the first exercise we’re going to show you today is going to be the hollow body hold. This is probably one of the most foundational core exercises that you can learn. Alright, so Chris is going to lay down onto his back, and we’re going to start with the easiest variation. So we wanted to make a short lever with our body. So he’s going to lift his legs up, knees bent 90 degrees. Okay, and then he’s going to curl up like he’s doing a crunch and his arms are going to be straight out like he’s reaching. Okay. Now, the important note here, if I try to put my hand underneath his low back, there’s absolutely no space, okay. So make sure that your lower back is pressing down into the ground. Okay, so this is the easiest variation to learn the hollow body hold. The biggest thing we’re trying to emphasize here is this nice posterior pelvic tilt. Okay, so another way to think about it, if he was wearing a belt, he wants to try and tilt his belt buckle up towards his face. Okay, so the next progression to make this a little bit harder, is to extend his legs, so he’s gonna extend them at about a 45 degree angle. So now we’re starting to link then the lever, so it’s getting to be a little bit more challenging. Now, if you’re saying, wait a minute, this is still a little bit too easy, he can start to drop down the legs a little bit lower to the ground, once again. Lengthening that lever, making it harder. Now, we’ll go into that reset position, so take a little break here. Now, if you want an added challenge, and you want to do the full hollow body hold variation, you’re going to extend all the way out, so legs first. He’s going to maintain that nice posterior pelvic tilt, lower the legs, drop those down. Good, keep squishing that low back into that ground. Good. Try, squish my hand, there it is. Okay, good, and he’s going to lower the arms as low as you can. Good. So ideally, you’re kind of making a little banana boat with the body, and that’s the full hollow body hold position.
The Bear Hold Exercise
Jess Elliot 03:07
So the next exercise we’re going to talk about is the next progression, and this is going to be the bear hold. So in addition to doing exercises laying on our back, we also want to flip over to make sure that we’re training the core from a 360 degree perspective. So Chris is going to transition to a quadrupeds position. So this is a staple position in strength and conditioning. Now, the biggest thing here is when you’re setting up, you want to make sure that your shoulders are stacked directly over the wrists, the hips are directly over the knees, spacing wise, his knees are about hip distance apart, so they’re not too close together, and they’re not too wide. And notice he’s also up on his toes, so his whole body is in alignment. So the very first progression that we will do here is called the bear hold. So he’s going to maintain this quadropod position, also known as bear position, and now for the hold, he’s just going to lift his knees up off the ground, and he’s going to hold here, while breathing, always make sure to breathe in this position, and he’s going to hold this position for a certain amount of time. So for our next progression, we are going to transition to a bear crawl. So this is going to be a little bit more challenging, because we’re adding in a component of dynamic stabilization. So can he maintain this position while moving? So same quadropod position, his knees are hovering off the ground. Now to move he’s going to step, opposite hand opposite foot at the same time, very small steps. So Chris, let’s demonstrate small steps. Good. And if you need an extra cue, put something on the low back, and this will help the athlete to stabilize. Let’s try to go backwards, opposite hand and foot. Beautiful. Good. So we’re getting a little bit of twisting here through the pelvis and low back. So the big thing here is you want to move almost like a table top. Okay, so we don’t want to see any twisting through the pelvis. We’re really working on that lumbo pelvic connection and that integrity. So we want to try to keep this as steady as possible. All right, for our third and final progression, we’re going to talk about the bear hold. But we’re going to add in some shoulder taps. Same idea, we’re going to add in some dynamic stabilization and throw him a little bit off of balance, and once again, we want him to maintain this nice flat back position, this nice quadropod position, while he’s adding in some stabilization elements. Alright, so he’s going to push up into a bear hold position, and very slowly, he’s just going to lift one arm up off the ground and tap the opposite shoulder. So you’ll notice we’ve got a little bit of a shift, weight shift here. Good. So the big thing here, you want to make sure that you’re driving down into the ground. So really push through the earth, both with the feet and the hands. There you go. Notice that the minute he started to drive into the ground, he got a little bit more stabilization. Same thing as before, if you need a little bit of cueing support for an athlete put something on their lower back, so they can feel if there’s a little bit of shifting and also to if it falls off. So let’s do a crazy rep and have that slider fall off your low back. Okay. Okay, so instant feedback to the athlete where he knows that that was a little bit too much instability, and this is our third and final progression to the bear hold.
Lateral Plank and Adductor Activation Exercise
Jess Elliot 06:26
We’re gonna be talking about a lateral plank, but we’re also going to spice it up by showing you another variation, that’s going to work more of the adductors, also known as the groin muscles. So first and foremost, let’s cover what a lateral plank looks like. So Chris is going to set up in a nice straight line from the ears all the way to the ankles. Good. So notice this beautiful arm reach, we’ve got a nice straight line from the top of the fingertips all the way down to the elbow. So that’s going to help ensure that his shoulders are stacked in a nice position, and his hips are nice and extended. So some of the things I tend to see go wrong is, as you can see here, he’s overarching, so he’s overachieving, pushing a little too high up, or also you can flex. So try to bend a little bit, fold yourself in half. There you go. So I also tend to see this where there’s too much flexion at the hips, go ahead, take a nice rest. So those are some of the common problems and errors that I see going into the lateral plank. So remember, head to heel, strongest deal. Now that we’ve covered the lateral plank, and we’ve talked about some common errors, we’re gonna start to spice things up and show you the fun variation, including the adductor activation. So the setup, instead of having the outside edge of his bottom foot on the ground, he’s gonna instead tuck this leg, and now he’s going to anchor himself on the ground with the inside edge of the top foot. Same exact body position, we want a nice straight line, head to heel, strongest steel, look at this beautiful, shoulder reach. Okay, so nice, straight line from fingertips all the way down to the elbows, shoulders are stacked, and now this bottom leg here can be used for support. If you need a little bit of assistance for this movement. Or if you want to make it harder, you can lift this leg up off the ground, notice his hips are starting to shift. So very lightly, we just want to twist them a little bit, and then extend extend a little more from the hips. Beautiful right there, and this is our lateral plank with adductor activation.
A Lateral Plank Variation
Jess Elliot 08:26
To show one final variation, this can be accomplished with a stool or a small box, you don’t actually want it to be too high, because it’s going to put unnecessary strain on the shoulders. So for this, we’re going to utilize a small stool. So once again, inside edge of the foot is going to be resting on the stool. He’s going to set up the rest of this plank the same exact way. So straight line from ears to ankles. Nice extended hip position. Good. Nice t-position from the fingertips all the way down to the elbow. Good, and now he’s bringing that leg up for the full variation. So this is our lateral plank with adductor activation.
A Plank with Shoulder Taps Exercise
Jess Elliot 09:14
For our next movement, we’re going to be showcasing plank with shoulder taps. But we’re also going to show a slightly harder variation using a kettlebell. So Chris is going to take a push up position. Now when you’re setting up for this, you want to make sure that the shoulders are stacked directly over the wrists, and then as far as foot width, this is going to vary depending on how challenging you want the movement to be. If you’re just starting out, I’d say take a wider foot position for a little bit more stability. And then also for some added cueing, we’re going to put something on the low back because if it slides off, we know that the pelvis is moving around too much. So the goal here is pelvic stability. So now we’re going to add in the shoulder tap. So very slowly, Chris is going to shift his weight. Yep, lifting up one hand to touch the opposite shoulder. So do a couple reps. Make sure you’re driving down pressing into the earth. So you really want to try to maintain all three points of contact. So stability is not just when we have four points of contact in the ground, if we’re stable there, then we can start to reduce those down to three, and then eventually down to two, and that’s how we do the plank with the shoulder taps.
Plank with a Kettlebell Drag
Jess Elliot 10:24
Alright, so take a quick little break, we’re going to reset. So if you want a harder variation, instead of doing the shoulder taps, we can actually add in weights by doing a kettlebell drag. So he’s going to set up in very, very same position, except we’re adding in a kettlebell. Now, when you add this, you don’t actually want it to be too high up. So I like to set it up kind of right underneath the torso, almost belly button height, still a nice wide foot stance, for optimal balance. Now he’s going to grab the kettlebell and drag it across to the opposite side, stabilize, and then same thing, opposite side, pulling it across the body. So what we’re looking at in this movement is what’s happening right here in this lumbo pelvic complex, and once again, if we want some added cueing, we can just put something on the low back to improve stability, and that’s how we do the plank with the shoulder tops and the plank with the kettlebell drag. Nice job, Chris.
Reverse Table Top
Jess Elliot 11:26
All right, for our final movement, we’re going to showcase reverse tabletop. So we’ve done a lot of movements for the frontal plane, sagittal plane, but we also want to make sure that we’re working on the posterior chain, instead of just working on the anterior side. So Chris is going to set up in the reverse tabletop position. So think about a quadruped in reverse, beautiful, nailed it, first try.
Jess Elliot 11:48
So when you’re setting up in this position, make sure that the knees are directly above the ankles and the shoulders are directly above the wrists. As far as if the hands are facing out or forward with the fingertips, it’s whatever’s comfortable for you. Another thing here is notice that Chris’s neck is nice and neutral. What we don’t want to see is the head flexed. So pull your head up, tuck your chin to your chest, good. Or, relax it’s super far back. Okay, so we don’t want to see either of those, we want to maintain a nice and neutral position. Alright, how are you doing, Chris? Do we need a break?
Chris Case 12:18
No, I’m good.
Single Leg Table Top
Jess Elliot 12:18
All right. So lastly, if we want to make this a little bit harder, we can modify this into a single leg variation. So to do this, we’re going to pick a leg, your favorite one. Extended straight out. Okay, now notice as we change our base of support from four legs down to three, okay, the body wants to twist. So we want to extend it the hips, so lift up a little bit higher, the thigh should be parallel to one another. And we don’t want this hip to drop, and we’re just going to hold in this position for whatever designated period of time you decide on, and then when you’re ready, you would switch to the opposite side. And once again, just extend from the hips, so yup make sure the hips are high, we don’t want to see any saggy hips. Nice straight line from the shoulders all the way down to the knees, and this is how we do reverse tabletop and the single leg variation.
Chris Case 13:08
As always, we love your feedback. So join us and join the conversation at forums.fasttalklabs.com to discuss all of what you’ve heard today and so much more.